PTO Shaft for Diggers – Reliable Power Where It Matters
The digger is a workhorse of modern farming, and its productivity depends entirely on the integrity of the PTO shaft connecting it to the tractor. Our digger PTO drive shaft is engineered for the specific torque, speed, and articulation demands of excavation and earth-moving. With heat-treated components and precision-balanced joints, it delivers trouble-free operation across thousands of hectares.
Technical Specifications – Diggers PTO Shaft
| Parameter | Spezifikation / Anpassbarer Bereich |
|---|---|
| Anwendung | Diggers |
| Empfohlene Traktorleistung | 80–350 HP |
| Zapfwellendrehzahl | 1000 rpm |
| Maximales Dauerdrehmoment | 800–2500 Nm |
| Maximales Drehmoment | 3750 Nm |
| Schaftserie | T5 / L5 (Heavy duty) / T6 / L6 (Super heavy duty) / T7 / L7 (Ultra heavy duty) |
| Yoke Material | Forged steel (40Cr) |
| Rohrprofil | Splined profile or Square profile |
| Keilwellenhärte | HRC 55-60 |
| U-Joint Bearing Type | Greased needle roller |
| Kreuzgelenkgröße | 30.2×92 mm / 34.9×93.1 mm / 22×54.8 mm |
| Schutzmaterial | Metal-reinforced composite / HDPE (high-density polyethylene) |
| Dynamisches Gleichgewicht | Dynamically balanced to ISO 1940 G6.3 |
| Empfohlenes Schmiermittel | EP2 lithium |
| Außendurchmesser des Rohres | 65 mm |
| Geschlossene Länge (Lmin) | 900–1500 mm (customisable) |
| Montagegewicht | 14–41 kg (varies by length) |
| Surface Treatment | Black oxide coated |
| Gardefarbe | Green (RAL 6018) |
| Maximum Extended Length | 1784 mm |
Understanding PTO Shaft Mechanics for the Diggers
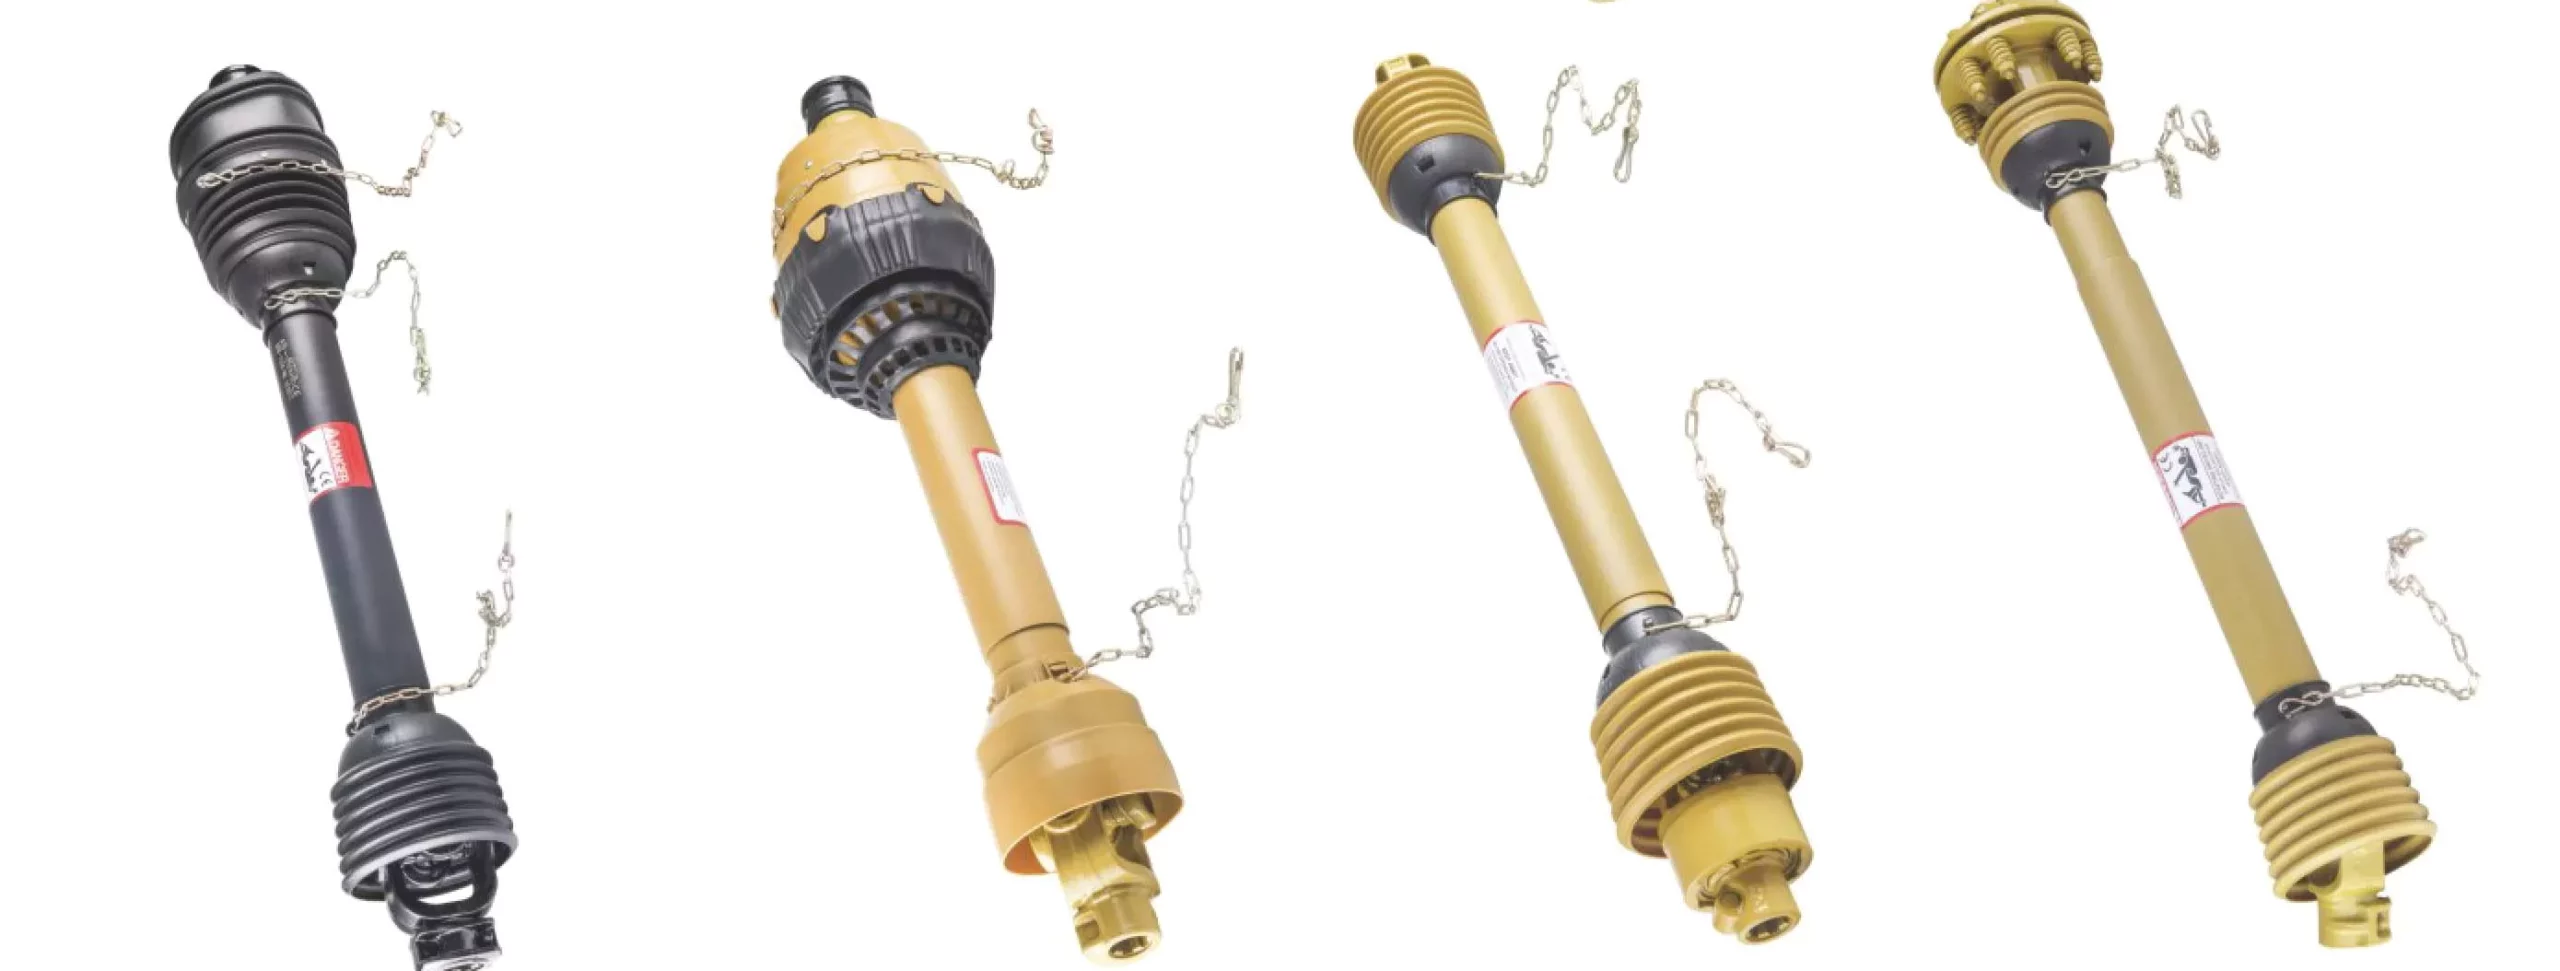
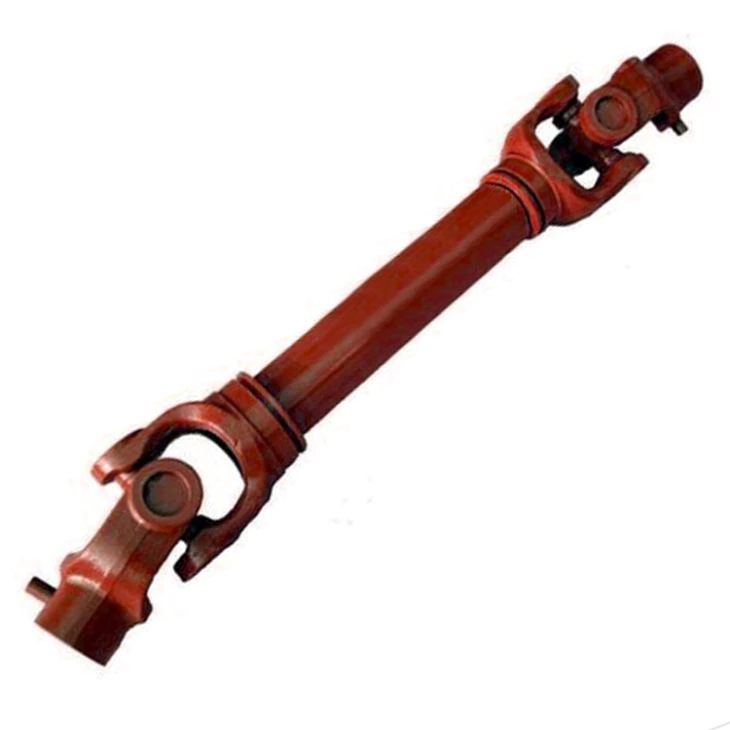
In excavation and earth-moving, the digger draws all its operating power through the PTO shaft. This shaft is essentially a rotating driveline that connects the tractor’s PTO output to the implement’s working mechanism via a series of universal joints and a telescoping tube.
The tractor-side yoke slides onto the PTO stub (typically 1-3/8" 6-spline or 1-3/4" 6-spline), locking into place. As the PTO engages, the stub begins to rotate, sending power through the shaft. The U-joints at each end allow the shaft to flex as the tractor and digger move independently over terrain.
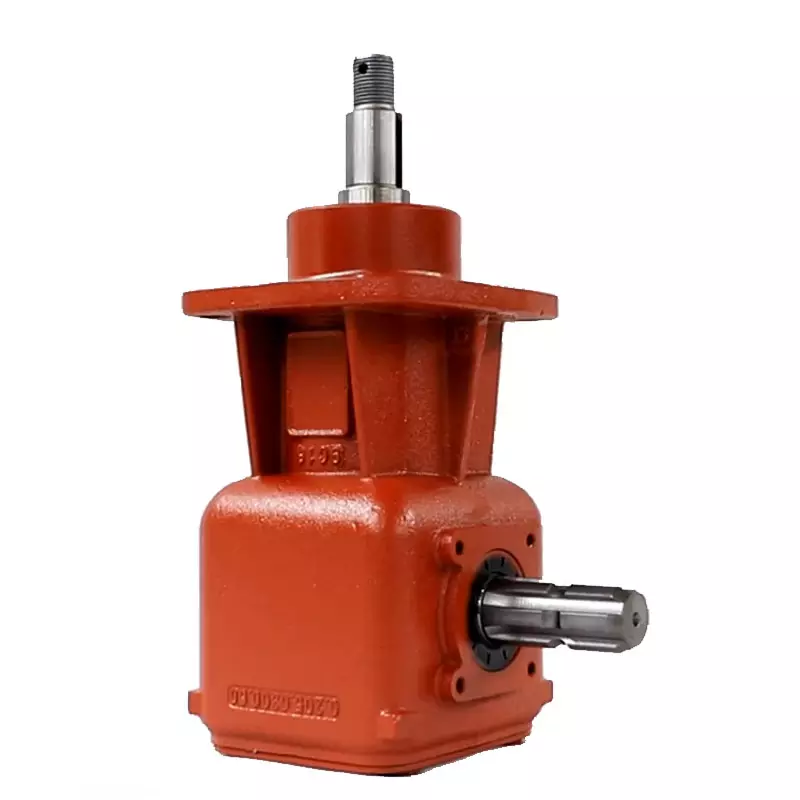
The telescoping section—made from a profiled tube (lemon, star, or triangular cross-section)—slides freely to absorb changes in the distance between tractor and implement. On the digger end, the shaft connects to a gearbox or direct-drive mechanism that converts PTO speed and torque into the specific motion needed for excavation and earth-moving.

Core Advantages of Our PTO Shaft for Diggers
⚙ Continuous-Duty Rated
Our digger PTO shaft is rated for continuous-duty operation, not just intermittent use—critical for high-throughput commercial farming.
🔧 Slip-Clutch Integration
Optional integrated slip clutch within the shaft assembly provides seamless overload protection without external bolt-on devices.
🔒 Shear-Pin Safety
Economy shear-pin option available for cost-sensitive operations, with replacement pins included in every shipment.
⚖ Greaseable Cross Kits
Despite sealed bearings, our crosses include grease nipples for optional periodic lubrication in extreme-duty environments.
🛠 Universal Guard Mounting
Guards fit all standard shaft diameters and include the mounting hardware and chains required for safe installation.
🏆 Technical Support Included
Free driveline engineering consultation with every purchase—our technicians help you select the correct shaft for your exact setup.
Compatible Brands & Interchangeable Parts
Farmers and contractors running digger equipment from John Deere, Driveline Parts, AgriCardan, PTOline, Profile Connect, AB Shaft will find our PTO shaft a seamless replacement. We maintain a comprehensive compatibility database to match our products to thousands of OEM part numbers.
⚠ References to third-party brands are provided exclusively to facilitate product selection and cross-referencing. We do not manufacture products for these brands, nor do we hold or claim any rights to their trademarks.
Replacement Components
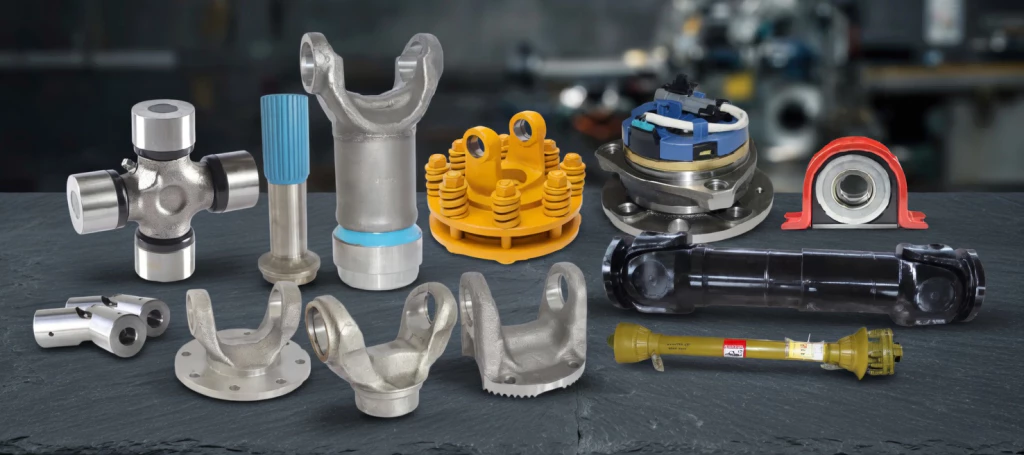
All shaft components are available as individual spares: universal joint kits, yokes in all standard bore sizes, telescoping tubes in various profiles, moulded safety guards, torque limiter assemblies, and complete rebuild kits. Extended availability ensures your shaft remains serviceable for years.
Standards, Policies & Regional Compliance
Australian Agricultural Machinery Standards
Our PTO shafts for digger applications are manufactured in compliance with the ASABE S203 (Guard dimensions) and ISO 5673 (PTO drive shaft interfaces) standards. These standards ensure dimensional compatibility and operational safety across all Australian farming environments.
Environmental Considerations
All materials used in our PTO shafts are RoHS-compliant. Packaging is recyclable, and we offer a used-shaft return programme for environmentally responsible disposal of end-of-life components.
Regional Service Coverage
We provide service and technical support across all Australian states and territories, including regional and remote areas. Local dealers in major agricultural centres stock our most popular shaft series and replacement parts for immediate availability.

Quick Selection Guide for Diggers PTO Shafts
Use the table below to determine the correct PTO shaft specification for your digger. Measure your existing shaft or consult your implement manual before ordering.
| Parameter | Was zu überprüfen ist | Typical Range for Diggers |
|---|---|---|
| Traktor PS | Überprüfen Sie das Typenschild des Traktors oder die Bedienungsanleitung. | 80–350 HP |
| Zapfwellendrehzahl | Einstellung der Traktorzapfwelle und Anforderungen an Anbaugeräte | 540 oder 1000 U/min |
| Zapfwellenverzahnungsgröße | Zählen Sie die Verzahnungen am Zapfwellenstummel des Traktors. | 1-3/8" 6-Zahn oder 1-3/4" 6-Zahn |
| Wellenlänge im geschlossenen Zustand | Traktorzapfwelle messen, um Eingaben zu implementieren | 900–1500 mm |
| Erforderliches Drehmoment | Prüfen Sie die Bedienungsanleitung oder berechnen Sie die Berechnung anhand der PS-Zahl/Drehzahl. | 800–2500 Nm |
| Empfohlene Serien | Anpassung an das Drehmomentanforderung | T5 / L5 (Heavy duty) / T6 / L6 (Super heavy duty) / T7 / L7 (Ultra heavy duty) |
| Überlastschutz | Risiko einer plötzlichen Verstopfung einschätzen | Reibungskupplung oder Scherbolzen |
| Jochtyp implementieren | Anpassung zur Implementierung des Eingangswellenprofils | Schnellverschluss oder Keilwellenverschluss |
📌 Sie sind sich nicht sicher, welchen Schaft Sie wählen sollen? Kontaktieren Sie unser technisches Team. Bitte geben Sie Ihr Traktormodell und die Details Ihrer Anbaugeräte an, um eine kostenlose Empfehlung zu erhalten.
Installation Guide – PTO Shaft on Diggers
⚠ Warnung: Vor Beginn der Montage den Traktormotor abstellen, die Zapfwelle auskuppeln und warten, bis alle rotierenden Teile vollständig zum Stillstand gekommen sind. Beachten Sie die Sicherheitshinweise des Traktor- und Geräteherstellers.
Schritt 1: Vorinstallationsprüfung
Unpack the PTO shaft and inspect all components for shipping damage. Verify that the yoke splines, U-joints, profile tubes, and safety guards are in perfect condition. Confirm the shaft series and length match your digger requirements.
Schritt 2: Richtig einstellen
Park the tractor with the digger in its normal working position. Measure the distance from the tractor PTO stub face to the implement input shaft face. Adjust the telescoping tubes so that the shaft closed length is approximately 10–15 mm shorter than this measured distance to allow for suspension travel.
Schritt 3: Traktorseitige Jochverbindung
Schieben Sie die traktorseitige Gabel auf die Zapfwellenstummel. Achten Sie darauf, dass die Verzahnung vollständig einrastet und der Verriegelungsmechanismus (Druckstift oder Sicherungsring) hörbar einrastet. Prüfen Sie, ob übermäßiges Radialspiel vorhanden ist.
Schritt 4: Implement-Endjoch verbinden
Align the implement-end yoke with the digger’s input shaft. Slide the yoke onto the splines or into the keyway and secure with the appropriate locking mechanism. If a torque limiter is present, ensure it is correctly oriented per the manufacturer’s markings.
Schritt 5: Sicherheitsvorrichtungen anbringen
Schieben Sie die Schutzhaubenhälften über die Welle und verbinden Sie sie mit den mitgelieferten Klemmen. Befestigen Sie die Halteketten der Schutzhauben – eine an der Zugstange des Traktors oder einem festen Punkt, die andere am Anbaugeräterahmen. Die Schutzhauben müssen sich frei drehen lassen und dürfen niemals an einem rotierenden Bauteil befestigt werden.
Schritt 6: Abschließende Überprüfung und Testlauf
Prüfen Sie, ob alle Verbindungen fest sitzen. Starten Sie den Traktormotor und schalten Sie die Zapfwelle im Leerlauf ein. Beobachten Sie die Welle auf gleichmäßige Drehung, ungewöhnliche Vibrationen oder Geräusche. Erhöhen Sie die Drehzahl allmählich auf Betriebsdrehzahl. Überprüfen Sie alle Befestigungselemente nach der ersten Betriebsstunde erneut.

PTO Shaft Troubleshooting Guide for Diggers
| Symptom | Mögliche Ursache | Empfohlene Maßnahmen |
|---|---|---|
| Übermäßige Vibrationen während des Betriebs | Verschleiß der Kreuzgelenklager; Unwucht der Welle; zu großer Betriebswinkel | Kreuzgelenksatz ersetzen; Jochausrichtung prüfen; Betriebswinkel auf <25° reduzieren |
| Shear bolt breaks repeatedly | Implement blockage not cleared; wrong bolt grade used; shaft undersized | Clear blockage source; use only specified bolt grade; consider upgrading to next shaft series |
| Zapfwellentrennung während des Betriebs | Verschlissener Sicherungsring; beschädigte Haltenut am Zapfwellenstummel | Schnellkupplungsgabel ersetzen; Zapfwellenstummelnut prüfen und gegebenenfalls reparieren, falls verschlissen |
| Schutzvorrichtung dreht sich nicht frei | Schutzlager blockiert; Schutzvorrichtung beschädigt oder falsch ausgerichtet | Schutzlager austauschen; Schutzhälften richten oder ersetzen; Ketten wieder korrekt befestigen. |
| Ungewöhnliches jaulendes oder knirschendes Geräusch | Ausfall des Getriebeeingangslagers; falsch ausgerichtete Welle | Getriebe des Anbaugeräts prüfen; Traktor und Anbaugerät neu ausrichten; Wellenlängenüberlappung prüfen. |
| Klickende oder klopfende Geräusche bei niedriger Geschwindigkeit | Verschleißte Nadellager der Kreuzgelenke; lockere Gabel am Zapfwellenstummel | Kreuzgelenk austauschen; Verzahnungsverschleiß und Jochverriegelungsmechanismus prüfen. |
| Wärmeentwicklung am Kreuzgelenk | Unzureichende Schmierung; zu großer Betriebswinkel; Lagerausfall | Kreuzgelenke sofort fetten; Betriebswinkel verringern; Kreuzgelenksatz bei beschädigten Lagern austauschen. |
| Überlastkupplung rutscht unter normaler Last | Kupplungsscheiben verschlissen oder verschmutzt; falsches Drehmoment eingestellt | Drehmomenteinstellung der Kupplung anpassen; Kupplungsscheiben bei Verschleiß oder Ölverschmutzung ersetzen |
Case Studies – PTO Shaft for Diggers in Australia
Feldnotizen unseres Ingenieur- und Vertriebsteams in ganz Australien:
📍 Roma, QLD – Glen Armstrong
Zweck: Eine korrodierte Welle, die chemischen Sprührückständen ausgesetzt war, wurde ersetzt.
Rückmeldung: „Die Schutzvorrichtungen sind massiv und lassen sich frei drehen. Sie erfüllen tatsächlich die Arbeitsschutzbestimmungen, im Gegensatz zu den billigen Modellen anderer Anbieter.“
📍 Warrnambool, VIC – Stuart Palmer
Zweck: Upgraded from a light-duty shaft to a heavy-duty series for commercial-scale excavation and earth-moving
Rückmeldung: “We run our digger hard across 2,000 hectares and this shaft hasn’t missed a beat after two full seasons. Exceptional value for money.”
📍 Rockhampton, QLD – Dean Hartley
Zweck: Replaced a worn PTO shaft on a 3-year-old digger to restore full operating efficiency
Rückmeldung: “The integrated friction clutch saved my gearbox when we hit a buried rock. The shaft disengaged instantly and re-engaged once the obstruction was cleared. Worth every cent.”
📍 Bendigo, VIC – David Thompson
Zweck: Upgraded overload protection from shear bolt to friction clutch for smoother excavation and earth-moving
Rückmeldung: “I ordered a replacement cross kit six months later and it arrived within 48 hours. Great product, great service, great support.”
📍 Swan Hill, VIC – Ben Callahan
Zweck: Required a custom-length shaft for a non-standard tractor-to-implement spacing
Rückmeldung: “We swapped out our old economy shaft for this one and noticed an immediate reduction in vibration. The tractor runs quieter and the implement operates smoother.”
Frequently Asked Questions – PTO Shaft for Diggers
❓ Was verursacht vorzeitigen Ausfall von Kreuzgelenken?
Häufige Ursachen sind unzureichende Schmierung, zu große Betriebswinkel (über 25°), Betrieb mit überhöhter Drehzahl, Fehlausrichtung zwischen Traktor und Anbaugerät sowie fehlende regelmäßige Inspektion. Die Einhaltung des empfohlenen Wartungsplans verlängert die Lebensdauer der Kreuzgelenke erheblich.
❓ Can I use a 540 rpm shaft on a 1000 rpm PTO?
No. Using a shaft rated for 540 rpm on a 1000 rpm PTO will result in excessive speed, dangerous vibration, and potential catastrophic failure. Always match the shaft speed rating to both the tractor PTO setting and the implement requirement.
❓ How do I measure the correct closed length?
Hitch the implement to the tractor in its normal working position. Measure the straight-line distance from the face of the tractor PTO stub to the face of the implement input shaft. The shaft closed length should be approximately 10–15 mm less than this measurement.
❓ Can the shaft be shortened to fit my setup?
Yes. The telescoping profile tubes can be cut to a shorter length using an angle grinder or chop saw. Ensure a minimum of 1/3 overlap remains between the inner and outer tubes after cutting. Deburr all cut edges before reassembly.
❓ Wie oft sollte ich die Zapfwelle abschmieren?
Fetten Sie alle Kreuzgelenknippel alle 8–10 Betriebsstunden oder zu Beginn jedes Arbeitstages. Fetten Sie die Teleskopprofilrohre im gleichen Intervall. Verwenden Sie EP2-Lithiumkomplexfett oder das in Ihrer Produktanleitung empfohlene Fett.
❓ Sind Ihre Zapfwellen ausgewuchtet?
Ja. Alle unsere Nebenabtriebswellen werden während der Fertigung dynamisch ausgewuchtet. Dies reduziert Vibrationen, verlängert die Lagerlebensdauer und sorgt für einen ruhigeren Lauf im Vergleich zu unausgewuchteten Alternativen aus dem Zubehörhandel.
❓ What PTO shaft series do I need for my digger?
For most digger applications in the 80–350 HP range, we recommend the T5 / L5 (Heavy duty) or T6 / L6 (Super heavy duty) series. If you operate near the upper end of this range or in particularly demanding conditions, consider stepping up to the S8 (Wide-angle) series for additional safety margin.
❓ Worin besteht der Unterschied zwischen einer Scherbolzenkupplung und einer Reibungskupplung?
Ein Scherbolzen ist ein Verschleißbolzen, der bricht, wenn das Drehmoment seine Nennlast überschreitet. Er ist kostengünstig, muss aber nach jedem Einsatz manuell ersetzt werden. Eine Reibungskupplung rutscht bei Überlastung durch und greift automatisch wieder ein, sobald die Überlastung nachlässt. Dadurch wird ein unterbrechungsfreier Betrieb in Anwendungen mit häufigen Stoßbelastungen gewährleistet.
Verwandte Produkte
Complement your Diggers PTO shaft with these products from our range:
Your Diggers PTO Shaft Partner
From single-unit orders to container-load shipments, we are your dedicated partner for digger PTO shaft supply. Our commitment to quality, competitive pricing, and responsive service has earned us the trust of farmers and dealers across Australia.
Take the next step: Contact us today for a free consultation and custom quotation tailored to your exact requirements.