
PTO Shaft for Vegetable Seeder – Complete Driveline Assembly
Powering a vegetable seeder for precision vegetable seed planting requires a PTO shaft that can handle continuous torque transfer without failure. Our complete driveline assembly includes precision universal joints, telescoping profile tubes, safety shields, and overload protection—all matched to the operational demands of vegetable seeder equipment. This is more than a replacement part; it is an upgrade to your entire power train.
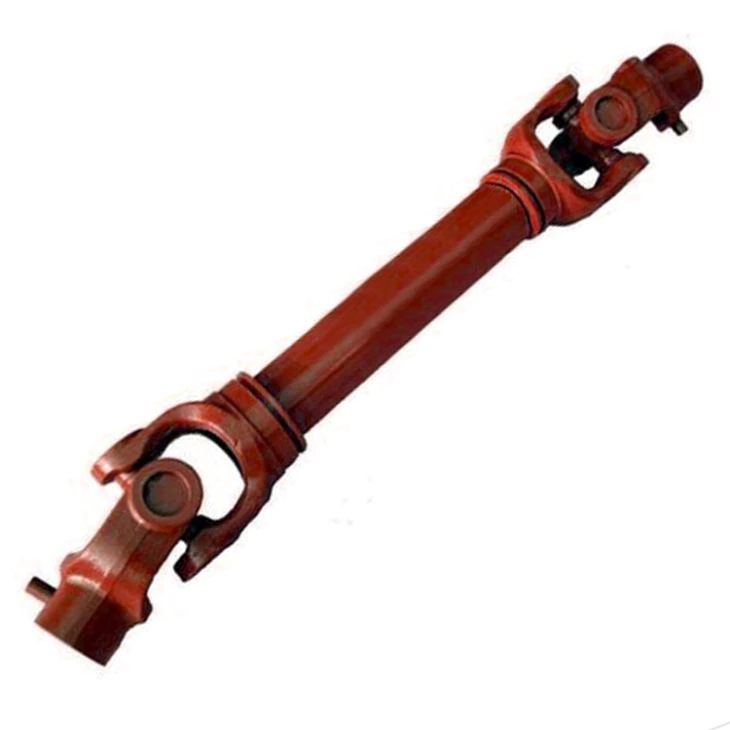
Technical Specifications – Vegetable Seeder PTO Shaft
| پیرامیٹر | تفصیلات / مرضی کے مطابق رینج |
|---|---|
| درخواست | Vegetable Seeder |
| تجویز کردہ ٹریکٹر HP | 15–50 HP |
| پی ٹی او سپیڈ | 540 rpm (Economy) |
| زیادہ سے زیادہ مسلسل ٹارک | 100–300 Nm |
| چوٹی ٹارک کی صلاحیت | 450 Nm |
| شافٹ سیریز | T1 / L1 (Light duty) / T2 / L2 (Light-medium duty) / G1 (Compact) |
| جوئے کے اختیارات کو نافذ کریں۔ | Splined yoke (1-3/8″ 21-spline) / Splined yoke (1-3/8″ 6-spline) |
| بیرونی ٹیوب قطر | 39.3 mm |
| ٹریکٹر-اینڈ یوک کے اختیارات | Double yoke / Splined yoke (1-3/8″ 21-spline) |
| تجویز کردہ چکنا کرنے والا | EP2 lithium-complex |
| Assembly Weight | 8–22 kg (varies by length) |
| آپریٹنگ درجہ حرارت کی حد | -25°C to +80°C |
| زیادہ سے زیادہ توسیعی لمبائی | 1134 mm |
| Maximum Operating Angle | 22° |
| سیفٹی گارڈ کا مواد | HDPE (high-density polyethylene) / Injection-moulded PP (polypropylene) |
| بند لمبائی (Lمنٹ) | 600–900 mm (customisable) |
| ٹیوب پروفائل | Square profile or Triangular profile |
| سپلائن کی سختی | HRC 60-65 |
| اوورلوڈ تحفظ کے اختیارات | Cam-release clutch / Friction clutch torque limiter / Ratchet torque limiter |
| یونیورسل جوائنٹ کراس سائز | 30.2×80 mm / 36×89 mm / 34.9×106.5 mm |
Working Principle of the Vegetable Seeder PTO Shaft
At its core, the PTO shaft is a torque conduit. It begins at the tractor’s PTO output—a splined stub rotating at a governed speed—and terminates at the vegetable seeder’s input flange or spline. Between these two endpoints, the shaft must compensate for three-dimensional movement: fore-aft telescoping, vertical angularity, and lateral offset.
Two Cardan-type universal joints provide the angular flexibility, while the lemon, star, or triangular profile tube slides within its mating tube to manage length changes. In the context of precision vegetable seed planting, this means the shaft continuously adapts as the tractor turns, undulates over terrain, or lifts the implement on its three-point hitch.
The vegetable seeder receives this rotational input through a gearbox or directly to its functional mechanism. The PTO shaft’s torque limiter acts as a mechanical fuse—if the implement encounters an immovable obstruction, the limiter disengages or absorbs the shock before damage can propagate to the tractor’s drivetrain.

Core Advantages of Our PTO Shaft for Vegetable Seeder
⚙ Alloy Steel Construction
Our vegetable seeder PTO shaft uses high-grade alloy steel tubing and forged yokes, offering up to 40% longer service life than economy alternatives.
🔨 Quick-Fit Yoke Options
Choose from quick-release, plain bore, or splined yokes for rapid implement changeover—no tools required in most configurations.
🔒 Multi-Stage Protection
Select from shear bolt, friction clutch, or free-wheel overrunning clutch protection to match your specific operational risk profile.
⚖ Low-Maintenance Bearings
Sealed needle-roller bearings in every U-joint eliminate frequent greasing while maintaining smooth, low-friction rotation under heavy loads.
🛠 Custom Length Options
Available in standard and custom closed lengths, our shafts fit virtually any tractor-to-implement spacing without modification.
🌍 Australian-Tested
Every shaft design is validated under Australian field conditions—heat, dust, and long operating hours—before release to market.
برانڈ مطابقت اور تبدیلی کے حصے
ہماری PTO shaft for vegetable seeder کی طرف سے فراہم کردہ ڈرائیو لائن اسمبلیوں کے لیے براہ راست فٹ متبادل کے طور پر ڈیزائن کیا گیا ہے۔ بینزی اور دی ترلیزی, ڈرائیو لائن کے حصے, Eurocardan, Shafto, جی کے این والٹرشیڈ, کامر انڈسٹریز، اور دیگر۔ ہم آپ کے موجودہ آلات کے لیے صحیح شافٹ کی شناخت میں مدد کے لیے کراس ریفرنس گائیڈز کا ذخیرہ کرتے ہیں۔
⚠ برانڈ کے ناموں کا حوالہ صرف کراس کمپیٹیبلٹی شناخت کے مقاصد کے لیے دیا جاتا ہے۔ ہم ذکر کردہ برانڈز میں سے کسی کے ساتھ وابستہ نہیں ہیں اور نہ ہی ہم کسی کی توثیق کا دعویٰ کرتے ہیں۔ تمام ٹریڈ مارک ان کے متعلقہ مالکان کی ملکیت رہیں گے۔
اسپیئر پارٹس اور لوازمات
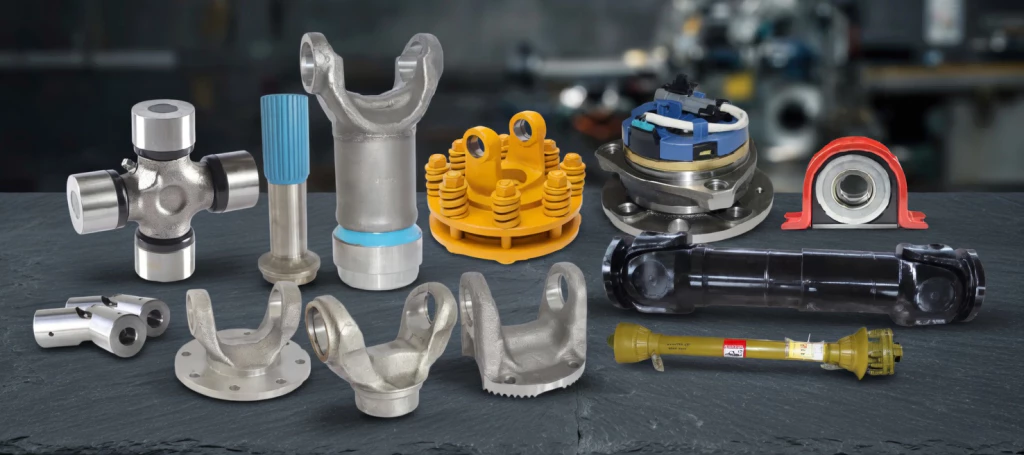
ہمارے پی ٹی او شافٹ کا ہر جزو انفرادی طور پر دستیاب ہے: یو جوائنٹ کراس کٹس، یوکس (ٹریکٹر اینڈ اور انپلیمینٹ اینڈ)، پروفائل ٹیوبز، سیفٹی گارڈز، گارڈ چینز، ٹارک لیمرز، اور بیئرنگ کٹس۔ اس کا مطلب ہے کہ آپ طویل مدتی ملکیت کے اخراجات کو کم کرتے ہوئے غیر معینہ مدت تک اپنے شافٹ کی خدمت اور دوبارہ تعمیر کر سکتے ہیں۔
ضوابط، تعمیل اور مقامی SEO کے تحفظات
آسٹریلیائی حفاظتی معیارات
All PTO shafts supplied for vegetable seeder applications comply with AS 1121 (Power take-offs for agricultural tractors) and AS/NZS 4024.1 (Safety of machinery). Safety guards meet the guarding requirements of Safe Work Australia’s model WHS Regulations.
عیسوی اور آئی ایس او کی تعمیل
ہماری مینوفیکچرنگ سہولت ISO 9001:2015 سرٹیفیکیشن رکھتی ہے۔ شافٹ اسمبلیاں ISO 5673 (زرعی ٹریکٹر اور مشینری - PTO ڈرائیو شافٹ) کے مطابق ڈیزائن کی گئی ہیں اور جہاں قابل اطلاق ہوں وہاں CE نشان زد ہیں۔
ریاست اور علاقہ کے تقاضے
کوئنز لینڈ، نیو ساؤتھ ویلز، وکٹوریہ، ویسٹرن آسٹریلیا، ساؤتھ آسٹریلیا، اور تسمانیہ میں PTO سے چلنے والے آلات کو زرعی مشینری کے لیے مقامی WHS کوڈز کی تعمیل کرنی چاہیے۔ ہماری شافٹ کو ان ذمہ داریوں کو پورا کرنے کے لیے تمام مطلوبہ حفاظتی محافظ اور دستاویزات فراہم کی جاتی ہیں۔

Quick Selection Guide for Vegetable Seeder PTO Shafts
Use the table below to determine the correct PTO shaft specification for your vegetable seeder. Measure your existing shaft or consult your implement manual before ordering.
| پیرامیٹر | کیا چیک کرنا ہے۔ | Typical Range for Vegetable Seeder |
|---|---|---|
| ٹریکٹر HP | ٹریکٹر کی نام پلیٹ یا دستی چیک کریں۔ | 15–50 HP |
| پی ٹی او سپیڈ | ٹریکٹر پی ٹی او کی ترتیب اور ضرورت کو نافذ کرنا | 540 یا 1000 rpm |
| پی ٹی او اسپلائن سائز | ٹریکٹر PTO سٹب پر اسپلائن کو شمار کریں۔ | 1-3/8" 6-اسپلائن یا 1-3/4" 6-اسپلائن |
| شافٹ بند لمبائی | ان پٹ کو لاگو کرنے کے لیے ٹریکٹر PTO کی پیمائش کریں۔ | 600–900 mm |
| مطلوبہ ٹارک | لاگو دستی چیک کریں یا HP/رفتار سے حساب لگائیں۔ | 100–300 Nm |
| تجویز کردہ سیریز | ٹارک کی ضرورت کے مطابق | T1 / L1 (Light duty) / T2 / L2 (Light-medium duty) / G1 (Compact) |
| اوورلوڈ تحفظ | اچانک رکاوٹ کے خطرے کا اندازہ لگائیں۔ | رگڑ کلچ یا شیئر بولٹ |
| جوئے کی قسم کو نافذ کریں۔ | ان پٹ شافٹ پروفائل کو لاگو کرنے کے لئے میچ | فوری رہائی یا منقطع |
📌 یقین نہیں ہے کہ کون سا شافٹ منتخب کرنا ہے؟ ہماری تکنیکی ٹیم سے رابطہ کریں۔ اپنے ٹریکٹر کے ماڈل کے ساتھ اور مفت سفارش کے لیے تفصیلات کو نافذ کریں۔
Installation Guide – PTO Shaft on Vegetable Seeder
⚠ انتباہ: ٹریکٹر کے انجن کو ہمیشہ بند کریں، PTO کو منقطع کریں، اور تنصیب شروع کرنے سے پہلے تمام گھومنے والے حصوں کے مکمل طور پر رکنے کا انتظار کریں۔ اپنے ٹریکٹر پر عمل کریں اور مینوفیکچرر کی حفاظتی ہدایات پر عمل کریں۔
مرحلہ 1: پہلے سے انسٹالیشن معائنہ
Unpack the PTO shaft and inspect all components for shipping damage. Verify that the yoke splines, U-joints, profile tubes, and safety guards are in perfect condition. Confirm the shaft series and length match your vegetable seeder requirements.
مرحلہ 2: شافٹ کی درست لمبائی سیٹ کریں۔
Park the tractor with the vegetable seeder in its normal working position. Measure the distance from the tractor PTO stub face to the implement input shaft face. Adjust the telescoping tubes so that the shaft closed length is approximately 10–15 mm shorter than this measured distance to allow for suspension travel.
مرحلہ 3: ٹریکٹر-اینڈ یوک کو جوڑیں۔
ٹریکٹر کے آخر والے جوئے کو PTO سٹب شافٹ پر سلائیڈ کریں۔ اس بات کو یقینی بنائیں کہ اسپلائنز پوری طرح مشغول ہیں اور لاکنگ میکانزم (پش پن یا کالر) جگہ پر کلک کرتا ہے۔ تصدیق کریں کہ ضرورت سے زیادہ ریڈیل پلے نہیں ہے۔
Step 4: Connect Implement-End Yoke
Align the implement-end yoke with the vegetable seeder’s input shaft. Slide the yoke onto the splines or into the keyway and secure with the appropriate locking mechanism. If a torque limiter is present, ensure it is correctly oriented per the manufacturer’s markings.
Step 5: Install Safety Guards
Slide the guard halves over the shaft and connect them using the supplied clips. Attach the guard retention chains—one to the tractor drawbar or a fixed point, one to the implement frame. The guards must be able to rotate freely and must never be attached to a rotating component.
Step 6: Final Check & Test Run
Verify all connections are secure. Start the tractor engine and engage the PTO at idle speed. Observe the shaft for smooth rotation, unusual vibration, or noise. Gradually increase to operating speed. Re-check all fasteners after the first hour of operation.
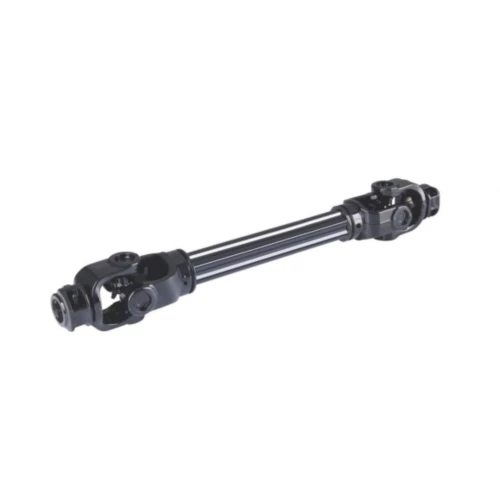
PTO Shaft Troubleshooting Guide for Vegetable Seeder
| Symptom | Possible Cause | Recommended Action |
|---|---|---|
| Clicking or knocking noise at low speed | Worn U-joint needle bearings; loose yoke on PTO stub | Replace U-joint assembly; check spline wear and yoke locking mechanism |
| Safety guard not rotating freely | Guard bearings seized; guard damaged or misaligned | Replace guard bearings; straighten or replace guard halves; re-attach chains correctly |
| Implement speed inconsistent | PTO shaft slipping; worn splines; clutch partially engaged | Check yoke engagement; replace yoke if splines are worn; adjust or replace clutch assembly |
| Shear bolt breaks repeatedly | Implement blockage not cleared; wrong bolt grade used; shaft undersized | Clear blockage source; use only specified bolt grade; consider upgrading to next shaft series |
| Unusual whining or grinding sound | Gearbox input bearing failure; misaligned shaft | Inspect implement gearbox; re-align tractor and implement; check shaft length overlap |
| Shaft will not telescope smoothly | Corrosion or debris in profile tubes; insufficient lubrication | Clean and grease profile tubes; replace if scoring is visible |
| Overload clutch slipping under normal load | Clutch plates worn or contaminated; incorrect torque setting | Adjust clutch torque setting; replace clutch plates if worn or oil-contaminated |
| Heat build-up at U-joint | Insufficient lubrication; excessive operating angle; bearing failure | Grease U-joints immediately; reduce operating angle; replace cross kit if bearings are damaged |
Case Studies – PTO Shaft for Vegetable Seeder in Australia
Field notes from our engineering and sales team across Australia:
📍 Kalgoorlie, WA – Steven Harris
Purpose: Outfitted a newly purchased second-hand vegetable seeder with a reliable aftermarket PTO shaft
Feedback: “The safety guards are solid and rotate freely. They actually meet the WHS requirements unlike the cheap ones you get from other suppliers.”
📍 Broome, WA – James Mitchell
Purpose: Replaced a worn PTO shaft on a 3-year-old vegetable seeder to restore full operating efficiency
Feedback: “The integrated friction clutch saved my gearbox when we hit a buried rock. The shaft disengaged instantly and re-engaged once the obstruction was cleared. Worth every cent.”
📍 Murray Bridge, SA – Dean Hartley
Purpose: Replaced a corroded shaft that had been exposed to chemical spray residues
Feedback: “I ordered a replacement cross kit six months later and it arrived within 48 hours. Great product, great service, great support.”
📍 Adelaide, SA – Shane O’Brien
Purpose: Upgraded from a light-duty shaft to a heavy-duty series for commercial-scale precision vegetable seed planting
Feedback: “Our mechanic was impressed with the precision of the splines and the quality of the needle bearings. He said it’s the best aftermarket shaft he’s fitted in 20 years.”
📍 Dubbo, NSW – Trevor Collins
Purpose: Needed a direct-fit replacement after the original shaft suffered a U-joint failure mid-season
Feedback: “We run our vegetable seeder hard across 2,000 hectares and this shaft hasn’t missed a beat after two full seasons. Exceptional value for money.”
Frequently Asked Questions – PTO Shaft for Vegetable Seeder
❓ Can the shaft be shortened to fit my setup?
Yes. The telescoping profile tubes can be cut to a shorter length using an angle grinder or chop saw. Ensure a minimum of 1/3 overlap remains between the inner and outer tubes after cutting. Deburr all cut edges before reassembly.
❓ What causes premature U-joint failure?
Common causes include insufficient lubrication, excessive operating angles (over 25°), running at speeds higher than rated, misalignment between tractor and implement, and lack of regular inspection. Following the recommended maintenance schedule significantly extends U-joint life.
❓ Are your PTO shafts balanced?
Yes. All our PTO shaft assemblies are dynamically balanced during manufacture. This reduces vibration, extends bearing life, and provides smoother operation compared to unbalanced aftermarket alternatives.
❓ What is the difference between a shear bolt and a friction clutch?
A shear bolt is a sacrificial pin that breaks when torque exceeds its rated capacity. It is inexpensive but requires manual replacement after each event. A friction clutch slips when overloaded and automatically re-engages when the overload clears, offering uninterrupted operation in applications prone to frequent shock loads.
❓ Can I use a 540 rpm shaft on a 1000 rpm PTO?
No. Using a shaft rated for 540 rpm on a 1000 rpm PTO will result in excessive speed, dangerous vibration, and potential catastrophic failure. Always match the shaft speed rating to both the tractor PTO setting and the implement requirement.
❓ What PTO shaft series do I need for my vegetable seeder?
For most vegetable seeder applications in the 15–50 HP range, we recommend the T1 / L1 (Light duty) or T2 / L2 (Light-medium duty) series. If you operate near the upper end of this range or in particularly demanding conditions, consider stepping up to the G1 (Compact) series for additional safety margin.
❓ How often should I grease the PTO shaft?
Grease all U-joint nipples every 8–10 hours of operation, or at the start of each working day. Grease the telescoping profile tubes at the same interval. Use EP2 lithium-complex grease or as recommended in your product manual.
❓ How do I measure the correct closed length?
Hitch the implement to the tractor in its normal working position. Measure the straight-line distance from the face of the tractor PTO stub to the face of the implement input shaft. The shaft closed length should be approximately 10–15 mm less than this measurement.
Related Products
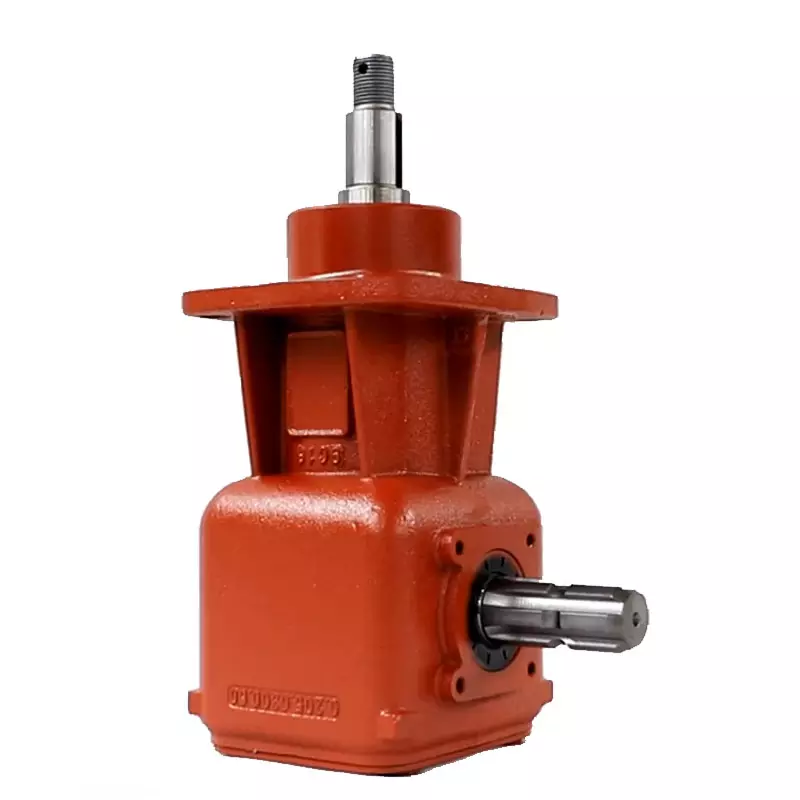
Complement your Vegetable Seeder PTO shaft with these products from our range:
Partner With Us – Vegetable Seeder PTO Shaft Solutions
Whether you are a farmer seeking a single replacement shaft, a dealer looking to stock reliable driveline products, or an OEM manufacturer requiring bulk supply, we are ready to support your needs. Our vegetable seeder PTO shafts are available in standard and custom configurations, with competitive pricing for volume orders.
📞 Contact our team today to discuss your requirements, request a quotation, or arrange a technical consultation. We are committed to delivering the right shaft, on time, every time.