Industrial-Grade PTO Shaft for Seed/Fertilizer Drill Equipment
When combined seed and fertilizer placement is your business, downtime is not an option. Our industrial-grade PTO shaft for seed drill is manufactured from high-strength alloy steel with induction-hardened splines and needle-bearing universal joints. Designed for the rigorous duty cycles of commercial farming, this shaft maintains peak torque delivery while protecting both tractor and implement from shock loads.

Technical Specifications – Seed/Fertilizer Drill PTO Shaft
| Parametro | Specifiche / Gamma personalizzabile |
|---|---|
| Applicazione | Seed/Fertilizer Drill |
| Potenza consigliata del trattore | 30–90 HP |
| Velocità presa di forza | 540/1000 rpm |
| Coppia massima continua | 200–600 Nm |
| Capacità di coppia massima | 900 Nm |
| Serie di alberi | T2 / L2 (Light-medium duty) / T3 / L3 (Medium duty) / T4 / L4 (Medium-heavy duty) |
| Lunghezza massima estesa | 1367 mm |
| Peso di assemblaggio | 13–30 kg (varies by length) |
| Equilibrio dinamico | Dynamically balanced to ISO 1940 G16 |
| Durezza della scanalatura | HRC 58-62 |
| Trattamento superficiale | Black oxide coated |
| Profilo del tubo | Star profile or Square profile |
| Opzioni di attacco per trattore | Plain bore yoke / Double yoke |
| Outer Tube Diameter | 65 mm |
| Operating Temperature Range | -30°C to +100°C |
| Guard Colour | Orange (RAL 2004) |
| U-Joint Bearing Type | Greased needle roller |
| Opzioni di giunzione terminale dell'utensile | Double yoke / Quick-release yoke |
| Tube Wall Thickness | 4.5 mm |
| Angolo operativo massimo | 45° |
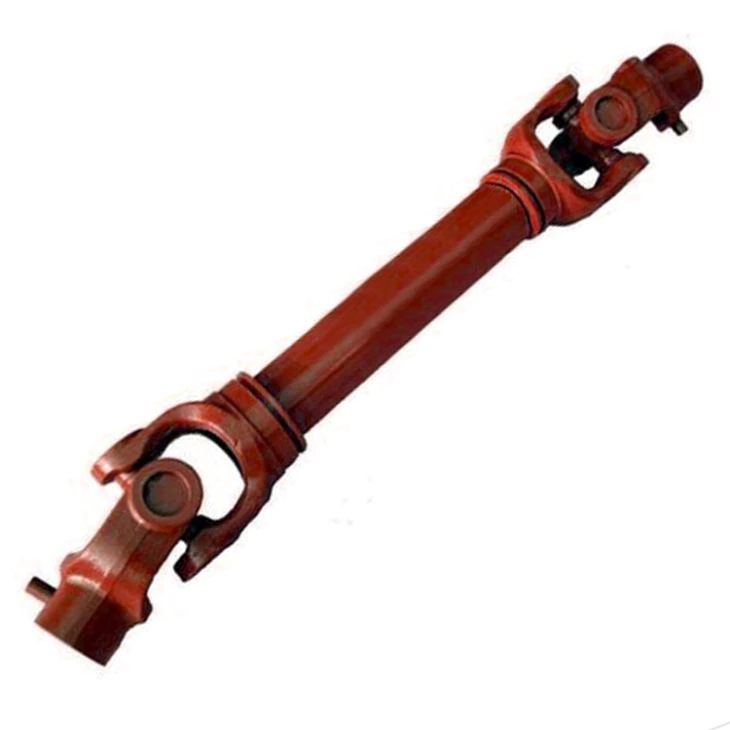
PTO Shaft Structure & Function on the Seed/Fertilizer Drill
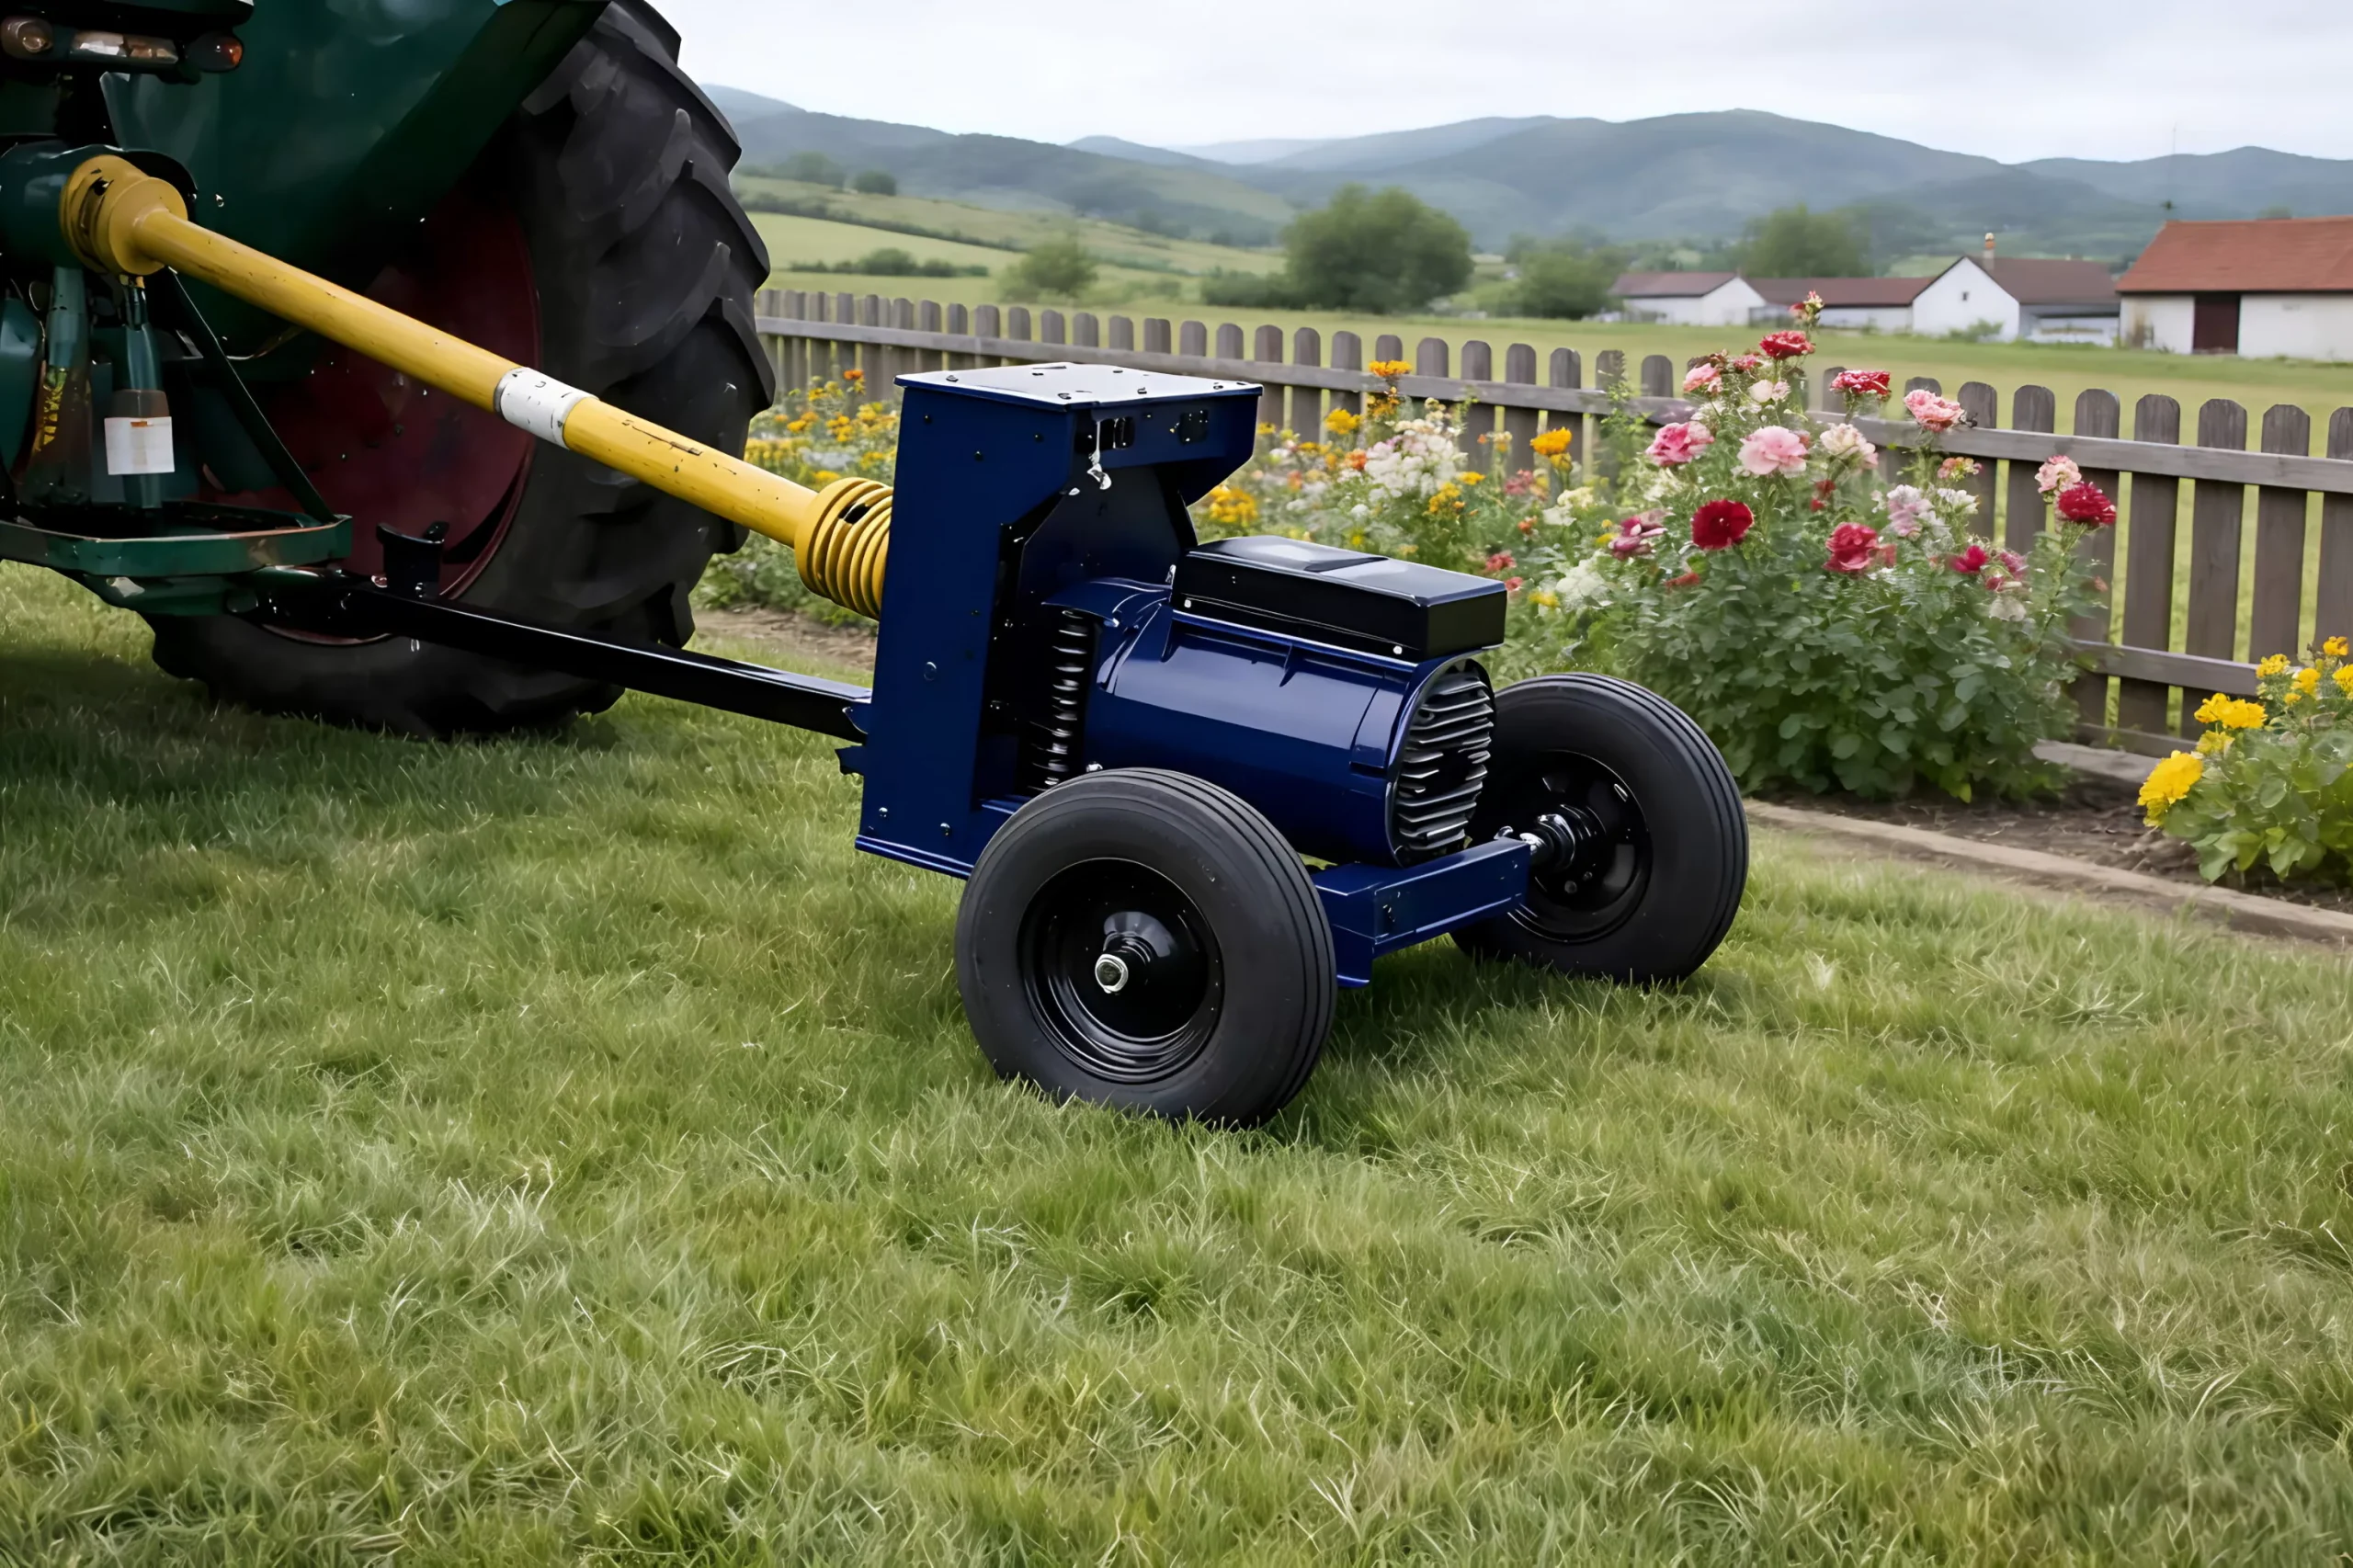
The power take-off (PTO) shaft is positioned between the rear of the tractor and the front input of the seed drill. It is a two-piece telescoping assembly connected by universal joints at each end. The tractor-end yoke mates with the PTO stub shaft, while the implement-end yoke connects to the seed drill’s gearbox input.
When engaged, rotational power flows from the tractor’s engine through the PTO gearbox, out the stub, through the first U-joint, along the profile tube, through the second U-joint, and into the implement. During combined seed and fertilizer placement, this power drives the cutting, turning, or processing mechanism of the seed drill.
Key structural components include: hardened splined yokes for positive engagement, needle-bearing U-joint crosses for smooth rotation under load, telescoping tubes for length adjustment, plastic safety shields with bearing-supported rotation, and an overload clutch or shear pin to protect the entire driveline from catastrophic failure.
Core Advantages of Our PTO Shaft for Seed/Fertilizer Drill
⚙ Forged Yoke Technology
Unlike stamped alternatives, our forged yokes for the seed drill PTO shaft deliver superior grain structure and impact resistance for demanding applications.
🔧 Wide-Angle Joint Option
Wide-angle constant-velocity joints available for applications requiring operating angles up to 80°, ideal for tight turning radii and steep terrain.
🔒 Automatic Re-engagement
Friction clutch models automatically re-engage once the overload condition clears, minimising downtime and getting you back to work faster.
⚖ Anti-Corrosion Finish
Zinc-plated hardware and powder-coated guards resist corrosion from agricultural chemicals, moisture, and UV exposure.
🛠 Metric & Imperial Compatibility
Dual-standard spline options ensure compatibility with both metric and imperial PTO stubs across all major tractor brands.
🏆 Global Quality Certification
ISO 9001:2015 certified manufacturing with full material traceability from raw steel to finished product.
Cross-Compatibility & Replacement Fit Guide
This PTO shaft is engineered to replace OEM and aftermarket drivelines fitted to seed drill equipment from Collegamento al profilo, GKN Walterscheid, Walterscheid, Shafto, Driveline Parts, Weasler, among others. Our technical team can cross-reference your existing part number to ensure a precise match.
⚠ The use of brand names above is for the sole purpose of assisting customers in identifying compatible replacement parts. No affiliation with or endorsement by any listed brand is implied. All trademarks belong to their respective owners.
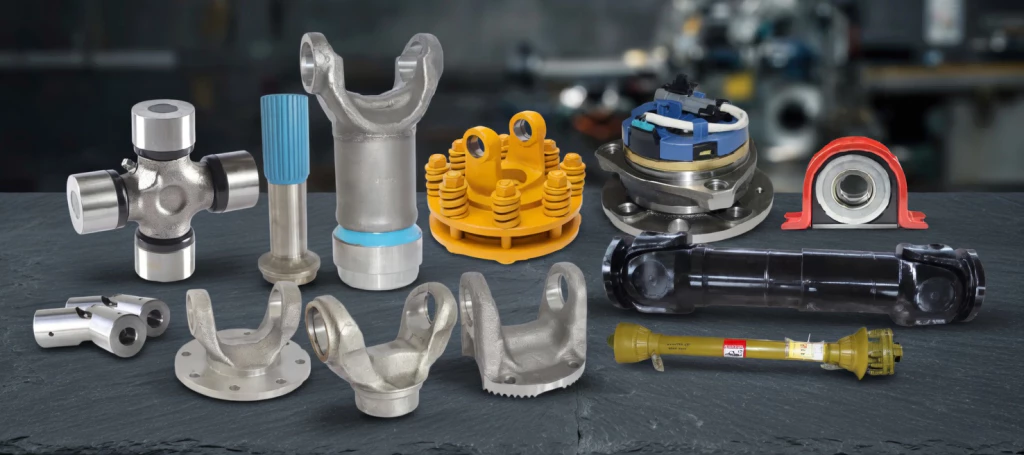
Individual Components & Spares
We supply every PTO shaft component separately—cross kits, yoke assemblies, inner and outer tubes, guard sets, clutch assemblies, shear pins, and mounting hardware—so you can rebuild or reconfigure your shaft as needed without purchasing a full replacement.
Regulatory Compliance & Regional Information
Work Health & Safety (WHS)
In Australia, PTO shaft guarding is mandated under the model Work Health and Safety Regulations. Every PTO shaft we supply for seed drill use includes a full-length safety guard assembly, meeting the requirements outlined in the Managing the Risks of Plant in the Workplace Code of Practice.
International Standards
Our products are manufactured to ISO 5673-1 and ISO 5673-2 specifications for PTO driveline dimensions and guarding. Universal joints conform to DIN 71752 for cross and bearing cup tolerances.
Import & Customs
PTO shafts and components are classified under Australian Customs Tariff heading 8483 (transmission shafts and cranks; bearing housings; gears and gearing). Duty rates and GST apply at the time of import. We handle all customs documentation for Australian deliveries.
PTO Shaft Selection Guide – Seed/Fertilizer Drill
Selecting the right PTO shaft for your seed drill is straightforward when you follow this step-by-step guide. Gather the information below before placing your order.
| Step | Action | Details for Seed/Fertilizer Drill |
|---|---|---|
| 1 | Identify tractor PTO HP | Typical: 30–90 HP for this application |
| 2 | Confirm PTO speed setting | 540 rpm or 1000 rpm (check implement manual) |
| 3 | Measure closed length (Lmin) | 700–1100 mm |
| 4 | Count tractor PTO splines | 6-spline (1-3/8") or 6-spline (1-3/4") most common |
| 5 | Check implement input connection | Splined, keyed, or flanged input |
| 6 | Calculate torque requirement | 200–600 Nm |
| 7 | Select shaft series | T2 / L2 (Light-medium duty) or T3 / L3 (Medium duty) |
| 8 | Choose overload protection | Friction clutch recommended for seed drill |
📌 Need help? Contattaci for expert guidance.
Targeted Installation Procedure – Seed/Fertilizer Drill PTO Shaft
⚠ Safety First: Disengage the PTO, switch off the engine, remove the ignition key, and allow all moving parts to come to a complete stop before working on the driveline. Wear appropriate PPE including close-fitting clothing and gloves.
Phase 1: Preparation
Lay out all shaft components and cross-reference against the packing list. Confirm the shaft series, closed length, and yoke specifications match your seed drill setup. Grease all U-joint nipples and slide the profile tubes back and forth several times to distribute lubricant.
Phase 2: Length Verification
With the seed drill hitched to the tractor in its normal operating position, measure the PTO-to-input distance. The shaft must have a minimum of 1/3 tube overlap at full extension and must not bottom out at the shortest position. Trim the tubes if the factory length requires adjustment (refer to cutting instructions in the product manual).
Phase 3: Tractor Connection
Push the tractor-end yoke fully onto the PTO stub. The quick-release collar should snap over the retaining groove. Pull back on the yoke to confirm it is locked. If using a plain-bore yoke, insert the shear pin and secure with a cotter pin.
Phase 4: Implement Connection
Connect the implement-end yoke to the seed drill’s input. If a clutch assembly is fitted at this end, ensure the clutch housing is oriented with the grease nipple accessible. Tighten any set screws to the specified torque.
Phase 5: Guard Fitting
Assemble the two guard halves around the shaft and clip together. Attach the anti-rotation chains: one chain to a stationary tractor point, one chain to the implement frame. Verify the guards spin freely by hand without contacting any part of the shaft or yokes.
Phase 6: Operational Test
Start the tractor, engage PTO at low idle, and run the seed drill unloaded for two to three minutes. Check for vibration, abnormal noise, or heat at the U-joints. If all checks pass, proceed to normal operating speed and begin field work. Re-torque all fasteners after the initial run-in period.
PTO Shaft Troubleshooting Guide for Seed/Fertilizer Drill
⚠ PTO shaft disconnects during operation
Possible Cause: Collare di bloccaggio usurato; scanalatura di ritegno danneggiata sul perno della presa di forza
Recommended Action: Sostituire il giunto a sgancio rapido; ispezionare e riparare la scanalatura del perno della presa di forza se usurata.
⚠ Overload clutch slipping under normal load
Possible Cause: Dischi della frizione usurati o contaminati; coppia di serraggio errata
Recommended Action: Regolare la coppia di serraggio della frizione; sostituire i dischi della frizione se usurati o contaminati dall'olio.
⚠ Safety guard not rotating freely
Possible Cause: Cuscinetti di protezione bloccati; protezione danneggiata o disallineata
Recommended Action: Sostituire i cuscinetti di protezione; raddrizzare o sostituire le metà della protezione; riattaccare correttamente le catene.
⚠ Implement speed inconsistent
Possible Cause: L'albero della presa di forza slitta; le scanalature sono usurate; la frizione è parzialmente innestata
Recommended Action: Verificare l'innesto del giunto; sostituire il giunto se le scanalature sono usurate; regolare o sostituire il gruppo frizione.
⚠ Clicking or knocking noise at low speed
Possible Cause: Cuscinetti a rullini del giunto cardanico usurati; forcella allentata sul perno della presa di forza
Recommended Action: Sostituire il gruppo giunto cardanico; controllare l'usura delle scanalature e il meccanismo di bloccaggio della forcella.
⚠ Excessive vibration during operation
Possible Cause: Cuscinetti trasversali del giunto cardanico usurati; albero non bilanciato; angolo di funzionamento eccessivo
Recommended Action: Sostituire il kit di giunzione cardanica; controllare l'allineamento della forcella; ridurre l'angolo di lavoro a <25°
⚠ Heat build-up at U-joint
Possible Cause: Insufficient lubrication; excessive operating angle; bearing failure
Recommended Action: Grease U-joints immediately; reduce operating angle; replace cross kit if bearings are damaged
⚠ Shear bolt breaks repeatedly
Possible Cause: Ostruzione non rimossa; bullone di grado errato utilizzato; albero sottodimensionato
Recommended Action: Eliminare la fonte dell'ostruzione; utilizzare solo bulloni del grado specificato; valutare l'aggiornamento alla serie di alberi successiva
Case Studies – PTO Shaft for Seed/Fertilizer Drill in Australia
Appunti dal campo raccolti dal nostro team di ingegneri e venditori in tutta l'Australia:
📍 Hobart, TAS – Geoff Lawson
Scopo: Upgraded from a light-duty shaft to a heavy-duty series for commercial-scale combined seed and fertilizer placement
Feedback: “We run our seed drill hard across 2,000 hectares and this shaft hasn’t missed a beat after two full seasons. Exceptional value for money.”
📍 Devonport, TAS – Phil Bennett
Scopo: Needed a direct-fit replacement after the original shaft suffered a U-joint failure mid-season
Feedback: “Fitted perfectly to my seed drill with zero modification. The quality is noticeably better than the OEM shaft it replaced. I’ll be ordering more for my other implements.”
📍 Roma, QLD – Neville Grant
Scopo: Replaced a worn PTO shaft on a 3-year-old seed drill to restore full operating efficiency
Feedback: "Ho ordinato un kit di ricambio per la croce sei mesi dopo ed è arrivato entro 48 ore. Ottimo prodotto, ottimo servizio, ottimo supporto."
📍 Albany, WA – Paul Walker
Scopo: Replaced a corroded shaft that had been exposed to chemical spray residues
Feedback: "Il nostro meccanico è rimasto impressionato dalla precisione delle scanalature e dalla qualità dei cuscinetti a rullini. Ha detto che è il miglior albero di trasmissione aftermarket che abbia montato in 20 anni."
📍 Wagga Wagga, NSW – Trevor Collins
Scopo: Ho acquistato un albero cardanico completo come ricambio per il periodo di maggiore attività.
Feedback: “La frizione integrata ha salvato il mio cambio quando abbiamo urtato una roccia incastrata nel terreno. L'albero si è disinnestato all'istante e si è reinserito una volta rimosso l'ostacolo. Ne è valsa la pena fino all'ultimo centesimo.”
Frequently Asked Questions – PTO Shaft for Seed/Fertilizer Drill
❓ What PTO shaft series do I need for my seed drill?
For most seed drill applications in the 30–90 HP range, we recommend the T2 / L2 (Light-medium duty) or T3 / L3 (Medium duty) series. If you operate near the upper end of this range or in particularly demanding conditions, consider stepping up to the S6 (Standard) series for additional safety margin.
❓ What causes premature U-joint failure?
Common causes include insufficient lubrication, excessive operating angles (over 25°), running at speeds higher than rated, misalignment between tractor and implement, and lack of regular inspection. Following the recommended maintenance schedule significantly extends U-joint life.
❓ Come si misura la lunghezza corretta da chiuso?
Agganciare l'attrezzo al trattore nella sua normale posizione di lavoro. Misurare la distanza in linea retta dalla faccia del perno della presa di forza del trattore alla faccia dell'albero di ingresso dell'attrezzo. La lunghezza dell'albero a riposo dovrebbe essere di circa 10-15 mm inferiore a questa misura.
❓ Qual è la differenza tra un bullone di sicurezza e una frizione a disco?
Un bullone di sicurezza è un perno sacrificale che si rompe quando la coppia supera la sua capacità nominale. È economico ma richiede la sostituzione manuale dopo ogni evento. Una frizione slitta in caso di sovraccarico e si innesta automaticamente quando il sovraccarico scompare, offrendo un funzionamento ininterrotto in applicazioni soggette a frequenti carichi d'urto.
❓ Will this shaft fit my tractor and seed drill?
Our PTO shafts are available with all standard yoke types and spline sizes (1-3/8" 6-spline, 1-3/4" 6-spline, 1-3/4" 20-spline, and more). Provide your tractor model and seed drill make/model, and our team will confirm compatibility before dispatch.
❓ How often should I grease the PTO shaft?
Grease all U-joint nipples every 8–10 hours of operation, or at the start of each working day. Grease the telescoping profile tubes at the same interval. Use EP2 lithium-complex grease or as recommended in your product manual.
❓ Effettuate spedizioni nelle zone regionali e remote dell'Australia?
Certamente. Spediamo in tutti i codici postali australiani tramite i principali corrieri. Le zone regionali e remote potrebbero avere tempi di consegna leggermente più lunghi, ma collaboriamo con diversi corrieri per garantire consegne affidabili in tutto il paese.
❓ Gli alberi cardanici della tua presa di forza sono bilanciati?
Sì. Tutti i nostri alberi cardanici per presa di forza vengono bilanciati dinamicamente durante la produzione. Ciò riduce le vibrazioni, prolunga la durata dei cuscinetti e garantisce un funzionamento più fluido rispetto alle alternative aftermarket non bilanciate.
Prodotti correlati
Complement your Seed/Fertilizer Drill PTO shaft with these products from our range:
Let’s Work Together – Seed/Fertilizer Drill PTO Shaft Supply
We supply PTO shafts for seed drill applications to individual farmers, agricultural dealers, service workshops, and OEM manufacturers across Australia and internationally. Bulk pricing, custom specifications, and private-label options are available for qualified partners.
Ready to get started? Reach out to our sales and engineering team for personalised service.