Industrial-Grade PTO Shaft for Duster Equipment
When powder pesticide application is your business, downtime is not an option. Our industrial-grade PTO shaft for duster is manufactured from high-strength alloy steel with induction-hardened splines and needle-bearing universal joints. Designed for the rigorous duty cycles of commercial farming, this shaft maintains peak torque delivery while protecting both tractor and implement from shock loads.
Technical Specifications – Duster PTO Shaft
| Parámetro | Especificaciones / Gama personalizable |
|---|---|
| Solicitud | Duster |
| Potencia recomendada del tractor | 15–50 HP |
| Velocidad de la toma de fuerza | 540 rpm (Economy) |
| Par máximo continuo | 100–300 Nm |
| Capacidad de par máximo | 450 Nm |
| Serie de ejes | T1 / L1 (Light duty) / T2 / L2 (Light-medium duty) / G1 (Compact) |
| Dureza de la estría | HRC 55-60 |
| Opciones de horquilla para el extremo del tractor | Quick-release yoke / Flange yoke |
| Rango de temperatura de funcionamiento | -25°C to +80°C |
| Surface Treatment | Black oxide coated |
| Longitud máxima extendida | 1159 mm |
| Closed Length (Lmin) | 600–900 mm (customisable) |
| Espesor de la pared del tubo | 4.0 mm |
| Lubricante recomendado | EP2 lithium |
| Ángulo máximo de funcionamiento | 45° |
| Opciones de yugo en el extremo del implemento | Flange yoke / Splined yoke (1-3/8″ 6-spline) |
| Diámetro exterior del tubo | 47.4 mm |
| Material del yugo | Forged alloy steel (42CrMo) |
| Safety Guard Material | ABS plastic / Metal-reinforced composite |
| Tipo de cojinete de junta universal | Rodillo de aguja de precisión |
PTO Shaft Structure & Function on the Duster
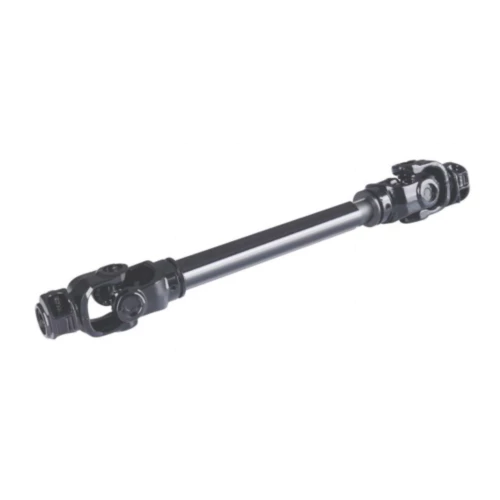
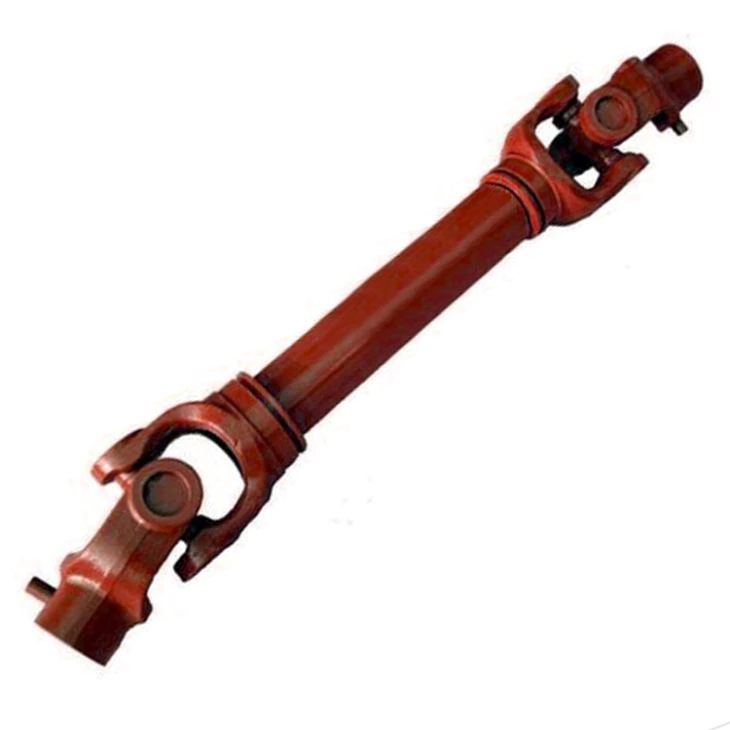
The power take-off (PTO) shaft is positioned between the rear of the tractor and the front input of the duster. It is a two-piece telescoping assembly connected by universal joints at each end. The tractor-end yoke mates with the PTO stub shaft, while the implement-end yoke connects to the duster’s gearbox input.
When engaged, rotational power flows from the tractor’s engine through the PTO gearbox, out the stub, through the first U-joint, along the profile tube, through the second U-joint, and into the implement. During powder pesticide application, this power drives the cutting, turning, or processing mechanism of the duster.
Key structural components include: hardened splined yokes for positive engagement, needle-bearing U-joint crosses for smooth rotation under load, telescoping tubes for length adjustment, plastic safety shields with bearing-supported rotation, and an overload clutch or shear pin to protect the entire driveline from catastrophic failure.
Core Advantages of Our PTO Shaft for Duster
⚙ Forged Yoke Technology
Unlike stamped alternatives, our forged yokes for the duster PTO shaft deliver superior grain structure and impact resistance for demanding applications.
🔧 Wide-Angle Joint Option
Wide-angle constant-velocity joints available for applications requiring operating angles up to 80°, ideal for tight turning radii and steep terrain.
🔒 Automatic Re-engagement
Friction clutch models automatically re-engage once the overload condition clears, minimising downtime and getting you back to work faster.
⚖ Anti-Corrosion Finish
Zinc-plated hardware and powder-coated guards resist corrosion from agricultural chemicals, moisture, and UV exposure.
🛠 Metric & Imperial Compatibility
Dual-standard spline options ensure compatibility with both metric and imperial PTO stubs across all major tractor brands.
🏆 Global Quality Certification
ISO 9001:2015 certified manufacturing with full material traceability from raw steel to finished product.
Compatible Brands & Interchangeable Parts
Farmers and contractors running duster equipment from Eurocardán, AB Shaft, Driveline Parts, PTOline, Bondioli & Pavesi, GKN Walterscheid will find our PTO shaft a seamless replacement. We maintain a comprehensive compatibility database to match our products to thousands of OEM part numbers.
⚠ References to third-party brands are provided exclusively to facilitate product selection and cross-referencing. We do not manufacture products for these brands, nor do we hold or claim any rights to their trademarks.
Replacement Components
All shaft components are available as individual spares: universal joint kits, yokes in all standard bore sizes, telescoping tubes in various profiles, moulded safety guards, torque limiter assemblies, and complete rebuild kits. Extended availability ensures your shaft remains serviceable for years.
Standards, Policies & Regional Compliance
Australian Agricultural Machinery Standards
Our PTO shafts for duster applications are manufactured in compliance with the ASABE S203 (Guard dimensions) and ISO 5673 (PTO drive shaft interfaces) standards. These standards ensure dimensional compatibility and operational safety across all Australian farming environments.
Environmental Considerations
All materials used in our PTO shafts are RoHS-compliant. Packaging is recyclable, and we offer a used-shaft return programme for environmentally responsible disposal of end-of-life components.
Regional Service Coverage
We provide service and technical support across all Australian states and territories, including regional and remote areas. Local dealers in major agricultural centres stock our most popular shaft series and replacement parts for immediate availability.

PTO Shaft Selection Guide – Duster
Selecting the right PTO shaft for your duster is straightforward when you follow this step-by-step guide. Gather the information below before placing your order.
| Paso | Acción | Details for Duster |
|---|---|---|
| 1 | Identificar la potencia de la toma de fuerza del tractor | Typical: 15–50 HP for this application |
| 2 | Confirmar el ajuste de velocidad de la toma de fuerza (PTO) | 540 rpm o 1000 rpm (consulte el manual del implemento) |
| 3 | Mida la longitud cerrada (Lmin) | 600–900 mm |
| 4 | Contar las estrías de la toma de fuerza del tractor | 6 estrías (1-3/8") o 6 estrías (1-3/4") son las más comunes |
| 5 | Compruebe la implementación de la conexión de entrada. | Entrada estriada, con chaveta o con brida |
| 6 | Calcular el par motor requerido | 100–300 Nm |
| 7 | Seleccione la serie de ejes | T1 / L1 (Light duty) or T2 / L2 (Light-medium duty) |
| 8 | Elija protección contra sobrecarga | Friction clutch recommended for duster |
📌 ¿Necesitas ayuda? Contáctanos para obtener orientación experta.
Targeted Installation Procedure – Duster PTO Shaft
⚠ La seguridad es lo primero: Desconecte la toma de fuerza, apague el motor, retire la llave de encendido y espere a que todas las piezas móviles se detengan por completo antes de trabajar en la transmisión. Use el equipo de protección personal (EPP) adecuado, incluyendo ropa ajustada y guantes.
Fase 1: Preparación
Lay out all shaft components and cross-reference against the packing list. Confirm the shaft series, closed length, and yoke specifications match your duster setup. Grease all U-joint nipples and slide the profile tubes back and forth several times to distribute lubricant.
Fase 2: Verificación de la longitud
With the duster hitched to the tractor in its normal operating position, measure the PTO-to-input distance. The shaft must have a minimum of 1/3 tube overlap at full extension and must not bottom out at the shortest position. Trim the tubes if the factory length requires adjustment (refer to cutting instructions in the product manual).
Fase 3: Conexión del tractor
Empuje completamente la horquilla del tractor sobre el extremo de la toma de fuerza. El collar de liberación rápida debe encajar en la ranura de retención. Tire de la horquilla hacia atrás para confirmar que está bloqueada. Si utiliza una horquilla de orificio liso, inserte el pasador de seguridad y fíjelo con una chaveta.
Fase 4: Implementar la conexión
Connect the implement-end yoke to the duster’s input. If a clutch assembly is fitted at this end, ensure the clutch housing is oriented with the grease nipple accessible. Tighten any set screws to the specified torque.
Fase 5: Instalación de la protección
Ensamble las dos mitades de la protección alrededor del eje y únalas con los clips. Coloque las cadenas antirrotación: una cadena en un punto fijo del tractor y la otra en el bastidor del implemento. Verifique que las protecciones giren libremente con la mano sin tocar ninguna parte del eje ni de las horquillas.
Fase 6: Prueba operativa
Start the tractor, engage PTO at low idle, and run the duster unloaded for two to three minutes. Check for vibration, abnormal noise, or heat at the U-joints. If all checks pass, proceed to normal operating speed and begin field work. Re-torque all fasteners after the initial run-in period.

PTO Shaft Troubleshooting Guide for Duster
⚠ Implementar velocidad inconsistente
Posible causa: El eje de la toma de fuerza patina; estrías desgastadas; embrague parcialmente acoplado.
Acción recomendada: Compruebe el acoplamiento de la horquilla; sustituya la horquilla si las estrías están desgastadas; ajuste o sustituya el conjunto del embrague.
⚠ El protector de seguridad no gira libremente
Posible causa: Los cojinetes de protección están atascados; la protección está dañada o desalineada.
Acción recomendada: Reemplace los cojinetes de protección; enderece o reemplace las mitades de la protección; vuelva a colocar las cadenas correctamente.
⚠ Embrague con sobrecarga que patina bajo carga normal
Posible causa: Discos de embrague desgastados o contaminados; ajuste de par incorrecto
Acción recomendada: Ajuste el par de apriete del embrague; sustituya los discos de embrague si están desgastados o contaminados con aceite.
⚠ El eje no se extenderá suavemente.
Posible causa: Corrosión o residuos en los tubos perfilados; lubricación insuficiente.
Acción recomendada: Limpie y engrase los tubos de perfil; reemplácelos si se observan marcas.
⚠ El eje de la toma de fuerza se desconecta durante el funcionamiento.
Posible causa: Collarín de bloqueo desgastado; ranura de retención dañada en el extremo de la toma de fuerza.
Acción recomendada: Reemplace la horquilla de liberación rápida; inspeccione y repare la ranura del vástago de la toma de fuerza si está desgastada.
⚠ Shear bolt breaks repeatedly
Posible causa: Implement blockage not cleared; wrong bolt grade used; shaft undersized
Acción recomendada: Clear blockage source; use only specified bolt grade; consider upgrading to next shaft series
⚠ Acumulación de calor en la junta universal
Posible causa: Lubricación insuficiente; ángulo de funcionamiento excesivo; fallo del cojinete
Acción recomendada: Engrase las juntas universales inmediatamente; reduzca el ángulo de funcionamiento; reemplace el kit transversal si los cojinetes están dañados.
⚠ Vibración excesiva durante el funcionamiento
Posible causa: Cojinetes transversales de junta universal desgastados; eje desequilibrado; ángulo de funcionamiento excesivo
Acción recomendada: Sustituya el kit de cruceta de juntas universales; compruebe la alineación de la horquilla; reduzca el ángulo de funcionamiento a <25°.
Case Studies – PTO Shaft for Duster in Australia
Notas de campo de nuestro equipo de ingeniería y ventas en toda Australia:
📍 Colac, VIC – Brian Edwards
Objetivo: Upgraded from a light-duty shaft to a heavy-duty series for commercial-scale powder pesticide application
Comentario: “El embrague de fricción integrado salvó mi caja de cambios cuando chocamos contra una roca enterrada. El eje se desacopló al instante y se volvió a acoplar una vez que se eliminó la obstrucción. Valió la pena cada centavo.”
📍 Swan Hill, VIC – Shane O’Brien
Objetivo: Outfitted a newly purchased second-hand duster with a reliable aftermarket PTO shaft
Comentario: “Las protecciones de seguridad son robustas y giran libremente. Cumplen con los requisitos de seguridad y salud laboral, a diferencia de las baratas que ofrecen otros proveedores.”
📍 Broome, WA – Scott Murray
Objetivo: Se sustituyó un eje corroído que había estado expuesto a residuos de aerosoles químicos.
Comentario: “We run our duster hard across 2,000 hectares and this shaft hasn’t missed a beat after two full seasons. Exceptional value for money.”
📍 Dubbo, NSW – Sam Thornton
Objetivo: Replaced a worn PTO shaft on a 3-year-old duster to restore full operating efficiency
Comentario: “Entrega rápida a zonas rurales de Australia. El eje llegó bien embalado y las juntas universales funcionan a la perfección. Me ha impresionado mucho la calidad de fabricación.”
📍 Port Augusta, SA – Stuart Palmer
Objetivo: Needed a direct-fit replacement after the original shaft suffered a U-joint failure mid-season
Comentario: “We swapped out our old economy shaft for this one and noticed an immediate reduction in vibration. The tractor runs quieter and the implement operates smoother.”
Frequently Asked Questions – PTO Shaft for Duster
❓ ¿Realizan envíos a zonas regionales y remotas de Australia?
Por supuesto. Realizamos envíos a todos los códigos postales australianos a través de las principales empresas de transporte. Las zonas regionales y remotas pueden tener tiempos de tránsito ligeramente más largos, pero trabajamos con varias empresas de transporte para garantizar una entrega fiable en todo el país.
❓ ¿Se puede acortar el eje para adaptarlo a mi configuración?
Sí. Los tubos telescópicos se pueden cortar a una longitud menor con una amoladora angular o una sierra de corte. Asegúrese de que quede un solapamiento mínimo de 1/3 entre los tubos interior y exterior después del corte. Elimine las rebabas de todos los bordes cortados antes del reensamblaje.
❓ How do I measure the correct closed length?
Hitch the implement to the tractor in its normal working position. Measure the straight-line distance from the face of the tractor PTO stub to the face of the implement input shaft. The shaft closed length should be approximately 10–15 mm less than this measurement.
❓ Will this shaft fit my tractor and duster?
Our PTO shafts are available with all standard yoke types and spline sizes (1-3/8" 6-spline, 1-3/4" 6-spline, 1-3/4" 20-spline, and more). Provide your tractor model and duster make/model, and our team will confirm compatibility before dispatch.
❓ What warranty do you offer on PTO shafts?
All PTO shafts carry a manufacturer’s warranty against defects in materials and workmanship. Warranty terms vary by series. Contact our team for specific warranty details applicable to your purchase.
❓ ¿Puedo usar un eje de 540 rpm en una toma de fuerza de 1000 rpm?
No. Usar un eje con una velocidad nominal de 540 rpm en una toma de fuerza (TDF) de 1000 rpm provocará una velocidad excesiva, vibraciones peligrosas y una posible falla catastrófica. Siempre ajuste la velocidad nominal del eje tanto a la configuración de la TDF del tractor como a los requisitos del implemento.
❓ Are your PTO shafts balanced?
Yes. All our PTO shaft assemblies are dynamically balanced during manufacture. This reduces vibration, extends bearing life, and provides smoother operation compared to unbalanced aftermarket alternatives.
❓ What PTO shaft series do I need for my duster?
For most duster applications in the 15–50 HP range, we recommend the T1 / L1 (Light duty) or T2 / L2 (Light-medium duty) series. If you operate near the upper end of this range or in particularly demanding conditions, consider stepping up to the G1 (Compact) series for additional safety margin.
Productos relacionados
Complement your Duster PTO shaft with these products from our range:
Your Duster PTO Shaft Partner
From single-unit orders to container-load shipments, we are your dedicated partner for duster PTO shaft supply. Our commitment to quality, competitive pricing, and responsive service has earned us the trust of farmers and dealers across Australia.
Take the next step: Contact us today for a free consultation and custom quotation tailored to your exact requirements.